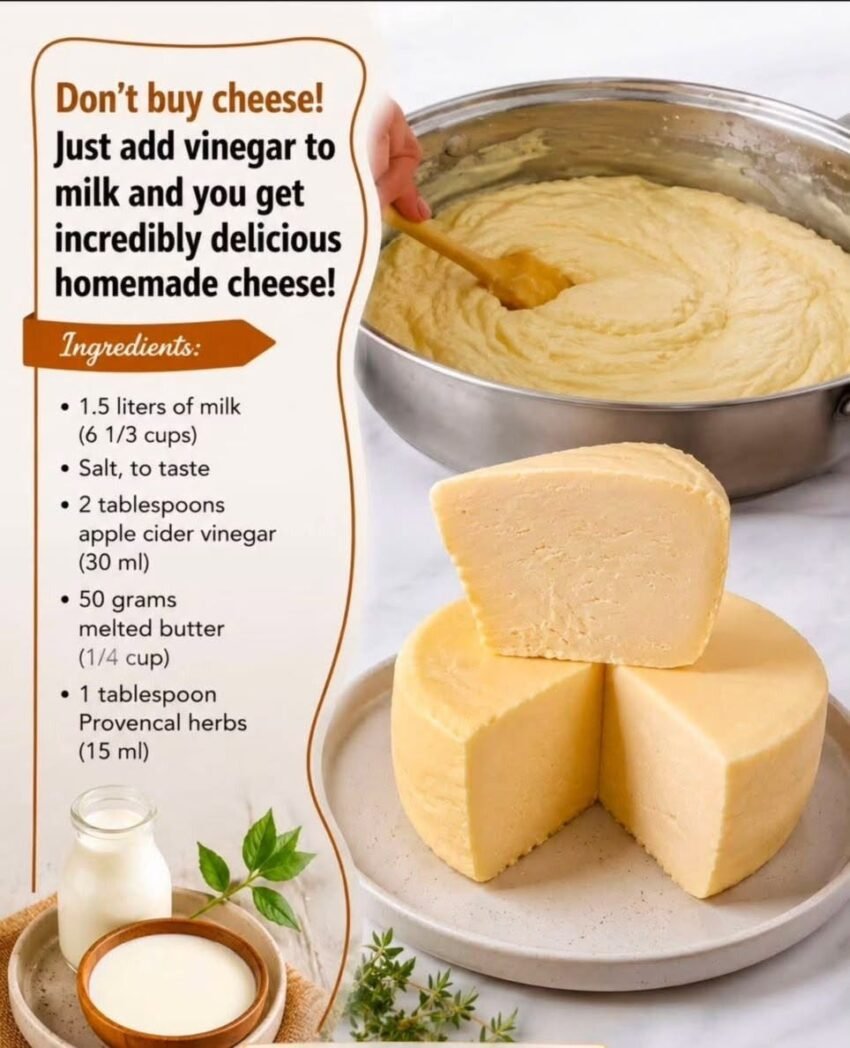
🧀✨ Homemade Cheese — Fresh, Creamy and Made with Just a Few Simple Ingredients!
Did you know you can make fresh cheese at home without expensive equipment, complicated techniques, or a professional cheese-making kit?
This easy Homemade Cheese recipe transforms ordinary whole milk into soft, creamy, fresh cheese using only lemon juice or vinegar and a little salt.
It has a mild flavor and a tender, crumbly texture similar to farmer’s cheese, queso fresco, or a firm homemade ricotta. You can spread it on toast, crumble it over salads, add it to pasta, fill sandwiches, serve it with crackers, or season it with fresh herbs.
It is one of those old-fashioned kitchen recipes that feels almost magical the first time you make it!
⏱️ Prep Time: 10 minutes
🔥 Cook Time: 15 minutes
⏳ Draining Time: 30–90 minutes
🕒 Total Time: About 1–2 hours
🧀 Yield: Approximately 1–1½ pounds of cheese
Ingredients
- 1 gallon whole milk
- ⅓ cup fresh lemon juice or white vinegar
- 1 teaspoon kosher salt, plus more to taste
- 2 tablespoons heavy cream, optional for a creamier texture
Optional Flavor Additions
- 2 tablespoons chopped fresh chives
- 2 tablespoons chopped parsley
- 1 teaspoon dried Italian seasoning
- ½ teaspoon garlic powder
- Freshly ground black pepper
- Crushed red pepper flakes
- Finely chopped jalapeño
- Lemon zest
- Honey, for a sweet version
Equipment
- Large heavy-bottomed pot
- Instant-read thermometer, recommended
- Fine-mesh strainer or colander
- Cheesecloth or a clean, thin kitchen towel
- Large bowl
- Wooden spoon or silicone spatula
Important Milk Note
Use regular pasteurized whole milk for the best result.
Avoid ultra-high-temperature or ultra-pasteurized milk when possible. High-temperature processing can change the milk proteins and may prevent firm curds from forming properly.
Do not use shelf-stable milk.
Whole milk creates the richest, creamiest cheese. Two-percent milk can work, but the yield may be lower and the texture less rich.
Instructions
1. Prepare the Strainer
Place a fine-mesh strainer or colander over a large bowl.
Line the strainer with several layers of cheesecloth or a clean, thin kitchen towel.
Make sure enough cloth hangs over the sides so you can gather it around the curds later.
Set the prepared strainer aside.
2. Heat the Milk Slowly
Pour the whole milk into a large, heavy-bottomed pot.
Place the pot over medium heat.
Heat the milk slowly, stirring frequently to prevent scorching on the bottom.
Bring the milk to approximately 190°F.
When you do not have a thermometer, look for steam, small bubbles around the edge, and a foamy surface. The milk should be very hot but not boiling aggressively.
3. Add the Acid
Remove the pot from the heat.
Slowly add the lemon juice or vinegar while gently stirring.
Stir for approximately 20–30 seconds, then stop.
Let the mixture sit undisturbed for 10–15 minutes.
The milk should separate into white curds and a yellowish liquid called whey.
When the whey still looks milky, add another tablespoon of lemon juice or vinegar and wait another 5 minutes.
4. Transfer the Curds
Carefully pour the curds and whey into the prepared cheesecloth-lined strainer.
Pour slowly to avoid splashing hot liquid.
Let the curds drain for approximately 10 minutes.
5. Season the Cheese
Sprinkle the salt over the curds.
When making a creamier cheese, gently fold in 1–2 tablespoons of heavy cream.
Add any optional herbs or seasonings at this stage.
Mix carefully so the curds do not become overly mashed.
6. Choose Your Desired Texture
For soft, spreadable cheese, drain for approximately 20–30 minutes.
For crumbly farmer’s cheese, drain for approximately 45–60 minutes.
For a firmer sliceable cheese, gather the cheesecloth around the curds and gently squeeze out additional whey.
Twist the cloth into a bundle and place it back in the strainer.
Set a plate over the bundle and place a heavy can or small pot on top.
Press for approximately 1–2 hours.
The longer the cheese drains and presses, the firmer it becomes.
7. Shape the Cheese
Open the cheesecloth and transfer the cheese to a plate or storage container.
Shape it into a round, square, or small log.
Taste and add additional salt when needed.
Refrigerate before serving for the cleanest texture.
What Does Homemade Cheese Taste Like?
This cheese has a mild, fresh, slightly tangy flavor.
The taste will vary depending on whether you use lemon juice or vinegar.
Lemon juice creates a lighter citrus note, while vinegar produces a more neutral tang.
Because it is a fresh cheese, it does not have the strong aged flavor of cheddar, Parmesan, or blue cheese.
Tips for Successful Homemade Cheese
✅ Heat the milk slowly: High heat can scorch the bottom.
✅ Stir frequently: Milk burns easily.
✅ Use a thermometer: Heating the milk close to 190°F produces more reliable curds.
✅ Do not boil aggressively: A hard boil can create tough curds.
✅ Use enough acid: The milk must separate completely into curds and whey.
✅ Let the curds rest: Give the acid time to work before straining.
✅ Do not squeeze too hard: Aggressive squeezing can make the cheese dry.
✅ Season while warm: Salt distributes more evenly in warm curds.
Herb and Garlic Cheese
Add:
- 2 tablespoons chopped chives
- 1 tablespoon chopped parsley
- ½ teaspoon garlic powder
- ¼ teaspoon black pepper
Serve with crackers, toasted baguette slices, or fresh vegetables.
Spicy Jalapeño Cheese
Add:
- 1 finely minced jalapeño
- ¼ teaspoon smoked paprika
- A pinch of cayenne pepper
- 2 tablespoons chopped cilantro
Use it in tacos, quesadillas, sandwiches, or breakfast burritos.
Italian-Style Cheese
Add:
- 1 teaspoon dried Italian seasoning
- ¼ teaspoon garlic powder
- 2 tablespoons chopped basil
- Freshly ground black pepper
Crumble it over pasta, pizza, tomato salad, or roasted vegetables.
Sweet Honey Cheese
Add only ½ teaspoon salt.
Stir in:
- 1–2 tablespoons honey
- ½ teaspoon vanilla
- A pinch of cinnamon
Serve with fruit, toast, pancakes, waffles, or graham crackers.
Ways to Use Homemade Cheese
Enjoy it:
- Spread over toast
- Crumbled into salads
- Stuffed into omelets
- Added to scrambled eggs
- Mixed into pasta
- Layered in sandwiches
- Served with crackers
- Added to grain bowls
- Used in tacos
- Crumbled over roasted vegetables
- Served with tomatoes and basil
- Used as a filling for pastries
- Added to lasagna or stuffed shells
What Can You Do with the Leftover Whey?
Do not automatically throw the whey away.
Use it in place of water in:
- Bread dough
- Pizza dough
- Pancakes
- Waffles
- Biscuits
- Muffins
- Soups
- Smoothies
- Cooked rice
- Mashed potatoes
Store whey in a covered container in the refrigerator for up to 3 days.
Can You Use Goat Milk?
Yes.
Goat milk produces a soft, tangy cheese.
The curds may be smaller and more delicate, so handle them gently.
Can You Use Reduced-Fat Milk?
Two-percent milk can be used, but the cheese may be less creamy and the yield may be lower.
Skim milk is not recommended when you want a rich texture.
Can You Use Plant-Based Milk?
This method does not work reliably with most almond, oat, or soy beverages because their proteins behave differently from dairy milk.
Special recipes and coagulants are generally required for non-dairy cheese.
Storage Instructions
Transfer the finished cheese to an airtight container.
Refrigerate it immediately and use within 4–5 days.
Always use a clean spoon or knife when serving.
Fresh cheese contains no preservatives and should not be stored at room temperature.
Can You Freeze Homemade Cheese?
Yes, but freezing may make the texture more crumbly after thawing.
Wrap it tightly and freeze for up to 2 months.
Thaw overnight in the refrigerator.
Frozen cheese works best in cooked dishes such as pasta, casseroles, soups, or scrambled eggs.
Important Food-Safety Reminder
Use pasteurized milk and clean equipment.
Keep the finished cheese refrigerated.
Discard it when it develops an unpleasant odor, visible mold, unusual discoloration, or a slimy texture.
This easy Homemade Cheese is fresh, affordable, customizable, and incredibly satisfying to make.
Once you watch warm milk transform into real cheese in your own kitchen, you may never look at a gallon of milk the same way again!
📌 Save this recipe for your next homemade kitchen project!
👇 Would you make yours plain, garlic-herb, spicy jalapeño, or sweet with honey? Tell us in the comments!
#HomemadeCheese #FreshCheese #CheeseMaking #FromScratchRecipes #FarmersCheese #EasyRecipes #HomemadeFood #KitchenSkills #CheeseLovers #SimpleIngredients #OldFashionedRecipes #CookingAtHome #DIYFood #FoodFromScratch #RecipeOfTheDay
━━━━━━━━━━━━━━━━━━━━━━